Guide on How to Use Our Invoice Generator
Our invoice generator provides different functionalities depending on whether you are logged in or not. Logged-in users will have access to additional options and features.
Guide for Logged-in Users
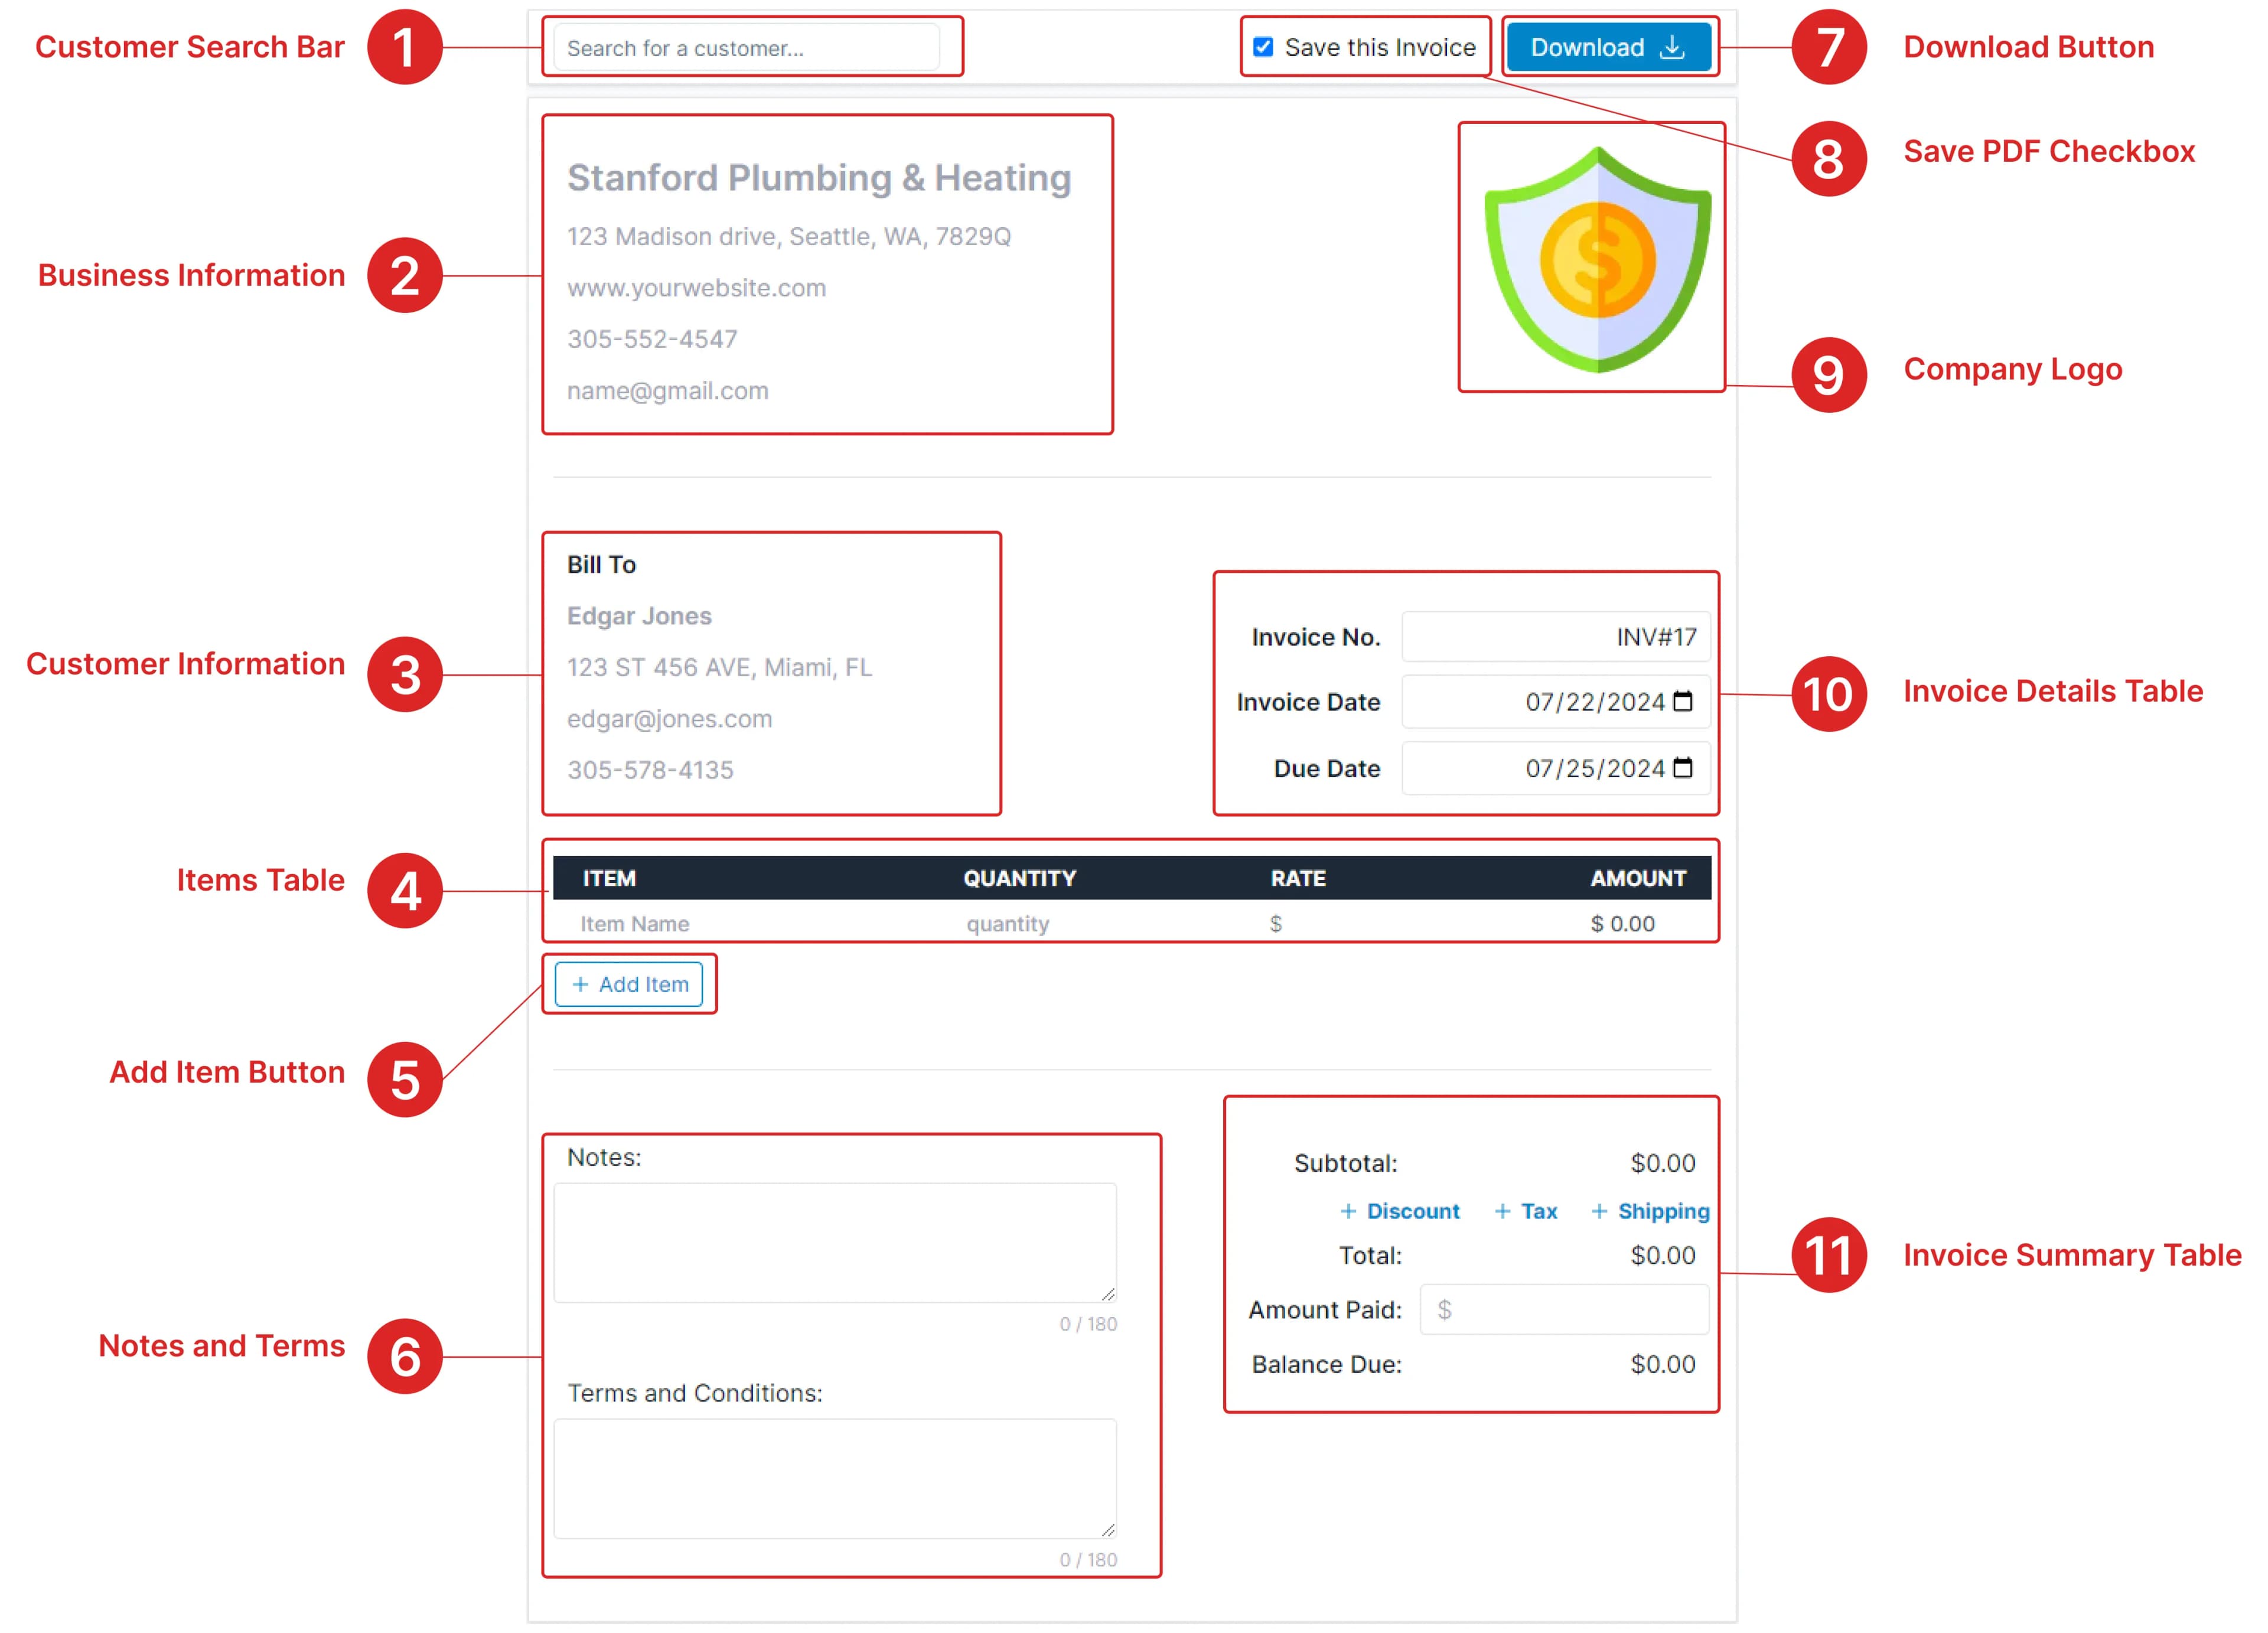
Customer Search Bar
Use this search bar to find existing customers. Simply type the customer's name, select the correct entry from the search results, and their information will be automatically filled in the customer information section below (#3).
Business Information
Enter your business details here. You can set up default information that will automatically populate every time you create a new invoice. This can be configured in the settings page.
Customer Information
This section is for the details of the customer you are billing. If you have saved customers, you can search for them in the search bar above (#1) and click to autocomplete. To add a new customer, visit the customer page and click "Create New Customer."
Items Table
Add items to your invoice by entering the item name, quantity, and price. To remove an item, hover over it and click the 'x'
Add Item Button
Click this button to add new items to your invoice. A new row will appear in the items table where you can enter the item details.
Notes and Terms and Conditions
Add any notes or terms and conditions for the invoice here. If left blank, these fields will not appear in the final PDF.
Download Button
When your invoice is complete, click this button to download it as a PDF. To save the PDF in the database for future access, ensure the checkbox next to this button is checked (#8).
Save PDF Checkbox
Check this box if you want to save the invoice in the database. This allows you to view and download it later from the history page.
Company Logo
Your company logo will appear here. To add or change the logo, go to the settings page and upload your desired image.
Invoice Details Table
Enter the invoice number, date, and due date here. The invoice number is autogenerated based on the number of invoices created, incrementing by one each time. To change the invoice prefix (e.g., INV#), visit the settings page.
Invoice Summary Table
This table displays the subtotal, total, and any additional details such as discounts, tax, and shipping. If these fields are left blank, they will not appear on the final invoice PDF.